Open this in UX Builder to add and edit content

Basketball portraits

As I mentioned in a previous post, last minute notice I found out that there would be 2 teams,
and I would have 2 hours to get individual portraits & team pictures. Things looked to get worse:
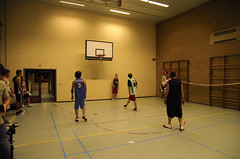
the A team was playing a friendly match and the B team was having fun on the backup court.

Me & Nico took up the other half of the court to set-up. Even before arriving I had a vision:
cool wooden floor, state-of the art basket ring , ugh … not !

This is what your average Belgian gym looks like :

your typical gym your typical gym

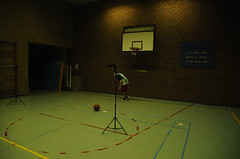
Note it’s 21:09PM now.

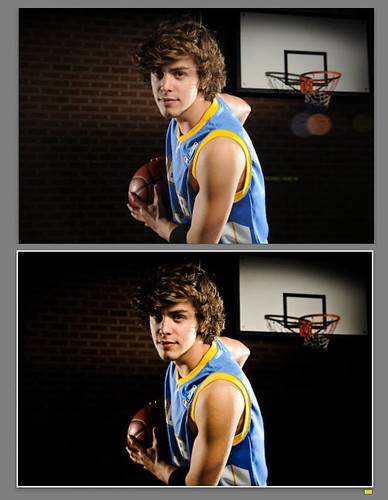
Snapping a shot at F8 at 1/250th gave me what I wanted to see …. nothing! Pitch black! Sweet.
So now we have control, we can light the parts we want to show up in the final picture and make this gym look like Madison Square garden.

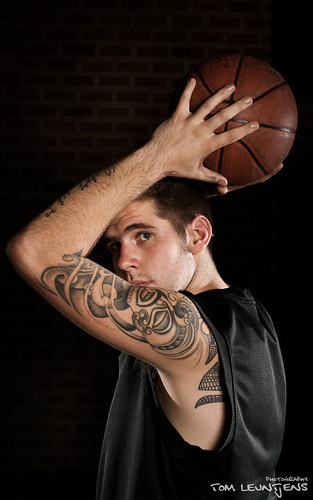
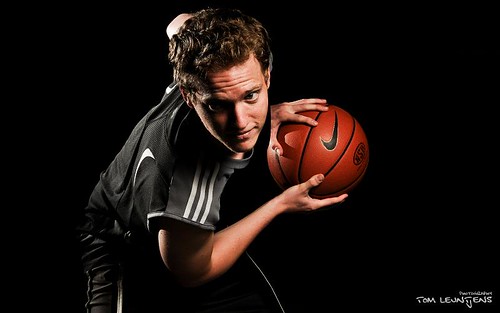
This is what the setup looked like, using only small portable flashes on light stands triggered by poverty wizards. An 580EXII and medium softbox in front of the model as the main/fill, 2 SB600’s snooted with cardboard left & right behind the model for the rim lights and another FL40 snooted and aimed at and slightly passed the ring/board to light the background. Another light stand with a black piece of paper was brought in to act as a gobo.


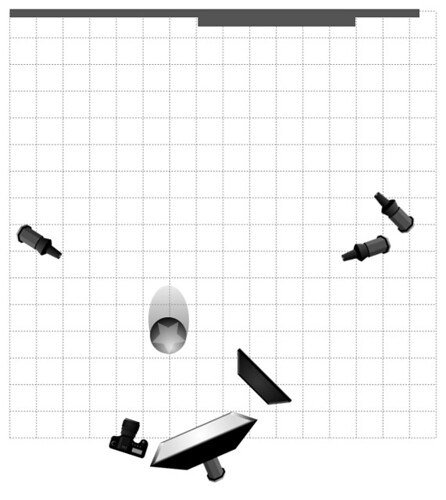
(for full specs click through on the image and check the notes on flickr)

The first player portrait was taken at 21:18PM.
The B team (youth) took turns posing in front of the camera & during substitions the guys from the A team dropped in as well.

Sometimes a misfire by one of the flashes gave some darn cool results as well.

The last player portrait was taken at 22:07PM. Plenty of time left for the team pictures & some experimenting. But more about that later this week! Stay tuned.

View the complete set.

A special thanks to Nico for assisting me and hauling gear.
Lucky for him me, on the times he took away my flash recycle time he managed to get some good shots in.

Throw me a stick: Before & after

Dang, 2 sticks in 2 weeks. People are reading my blog *suprised*, and not the least … Pieter Van Impe threw me a before & after stick this weekend. So it’s my turn to give you some insight in how I handle my images.

I’ve noticed a positive evolution in my processing. I don’t always need the drastic presets to change the look of an image. (although I still browse trough them looking for a nice reference/starting point) The base of a good processing is still the image you pull out of your camera. I’m not saying editing is a bad thing but maybe editing is the reason I can enjoy street photography that much. You know, those world-press photo kind of things. It’s honest…

So getting to know my camera better & learning about light means I get to visualize the look before I shoot it.

To get started, a shot of the basketball portraits that I’m currently editing. (another sneak preview). For this particular session, to get the look I wanted, it’s all about the light. (more about this in a next post). There is no way in hell I would have been able to get this look using flat, boring on-camera light, or by using the available fluorescent lights. Post processing for this shot was used to amplify that look : saturation, clarity, contrast & levels and some super vignetting (after cloning away that unwanted flare)

before & after

For the belly picture I also set up the lights for the look I wanted. Processing here was used to clean-up: adjusting WB, softening the skin & bringing out highlights on the wooden frame.

Black & White images are a bit problematic for me. I can’t see them before I shoot. I still play around in lightroom and hope to bounce into something I like… Lately I’ve noticed that setting my camera to a custom B/W image style and taking random pictures helps me seeing it better. Without passing the stick back to Pieter Van Impe, I am curious if he has some tips & tricks to share on that matter. Or anyone else ?

And sometimes I can’t stop at some simple adjustments …. (or I still just need to rescue a mediocre picture)

before & after

So receiving a stick means I get to pay it forward …

Bert Stephani, because I love his look and hope he has a small teeny little tip to share.
Tim Freh, because he ignored my first stick.
Aka van der velden, because maybe she already knows one of Bert’s secret.
Oh and an extra stick to Dave Hill … you never know 😉

Preview : Basketball Portraits

About 6 months ago on a family reunion I kind of launched the idea that I’d take pictures of Sven’s basketball team. Yesterday me & my interim assistant Nico hit the road.

Last minute notice: 2 teams, 20 players, 2 hours, portrait & team photos please…

And I didn’t want any of these kind of shots either … so the heat was ON!

Earlier this week David hobby over at strobist posted a very cool link to an article by Dustin Snipes: “70 basketball portraits in in two days”. I already had a similar lighting scheme in mind but some of the posing tips came in very handy. (I’m terrible with guiding models). So a big thanks to guys like David & Dustin for sharing with the community, I don’t think I would have been able to pull this off without guys like them.

I still have to go through all the pictures but, this one was a natural first pick.

Basketball Portraits - Preview

View On Black

Next week I’ll be doing a tech post about the location, lighting for the portraits (for those who can’t wait) and lighting for the team pictures.

I always appreciate some good constructive feedback! So lets hear it.